Setting up Notebook Hotkeys
July 27, 2007 Reading time: 2 minutes See Comments

I recently set up the hotkeys on my notebook in Mandriva 2007 running KDE. It is fairly simple to do and consists of one script file and then appropriate entries in “Keyboard Shortcuts”.
I created the following file called “command-shortcuts” and placed it in the “bin” directory in my home directory. Make sure to make it executable using “chmod +x command-shortcuts”.
#!/bin/sh
xmodmap -e “keycode 176 = F20″ # Volume up
xmodmap -e “keycode 174 = F21″ # Volume down
xmodmap -e “keycode 160 = F22″ # Mute volume
xmodmap -e “keycode 178 = F23″ # Mail hotkey
xmodmap -e “keycode 236 = F24″ # Web hotkey
xmodmap -e “keycode 162 = F25″ # Play / Pause
xmodmap -e “keycode 164 = F26″ # Stop
xmodmap -e “keycode 144 = F27″ # Previous Track
xmodmap -e “keycode 153 = F28″ # Next Track
xmodmap -e “keycode 115 = F29″ # Win
xmodmap -e “keycode 117 = F30″ # Menu
xmodmap -e “keycode 223 = F31″ # Sleep
The keycodes should work for many notebooks. To check they are right for your notebook you can run the ‘xev’ command in a console. The keycode will be displayed for each key you press.
So that the keycodes get loaded at each login, add “/home/{username}/bin/command-shortcuts” to the end of your “.bashrc” file. Replace {username} with your login name.
Now launch “Keyboard Shortcuts” from the “System”, “Conifguration”, “KDE”, “Regional & Accessibility” Menu. Here using the “Command Shortcuts” tab you can assign the “Mail” and “Web” Keys. Using the “Shortcut Schemes” you can assign the the “Win”, “Menu” & “Sleep” Keys. I set the “Win” key to switch to the next desktop, the “Menu” key brings up the KDE Menu and the “Sleep” key issue the logout command.
Finally you can set up the Volume Down, Up and Mute by right-clicking on the Mixer and selecting “Show Mixer Windows”. Then from the “Settings” menu select “Global Shortcuts” and assign the appropriate keys. You can do the same in Amarok for the “Play/Pause”, “Stop”, “Previous Track”, “Next Track”.
Thanks go to Ubuntu user zba78 who posted info on hotkeys at http://ubuntuforums.org/showthread.php?p=1260079.
I would appreciate your feedback if you have comments, corrections or additions to this article, Thanks.
See Comments
Using nVidia Twinview and mplayer
June 10, 2007 Reading time: ~1 minute See Comments

I recently set up a second monitor and then managed to use it to display video whilst still working on my main monitor as usual…
Here are the main settings to add to your xorg.conf file. In the "Screen" Section Add..
Option "MetaModes" "1024×768,1280×800"
Option "TwinView"
Option "TwinViewOrientation" "DFP-0 LeftOf CRT-0"
Option "TwinViewXineramaInfoOrder" "DFP-0, CRT-0"
To find the id's of your monitors look at the /var/log/xorg.0.log file. I reversed the order of the screens using "TwinViewXineramaInfoOrder" and placed CRT-0 to the right of DFP-0 with "TwinViewOrientation".
To play a video file on either screen you specify the "-xineramascreen" parameter with "0" or "1". For example…
$ mplayer -aspect 16:9 -stop-xscreensaver -xineramascreen 0 video-file-1.avi$ mplayer -aspect 16:9 -stop-xscreensaver -xineramascreen 1 video-file-1.aviSee Comments
Creating GP2X video files with Mencoder
January 14, 2007 Reading time: ~1 minute See Comments
 Here is a simple script for converting video files for use on the GP2X, videos are scaled to 320×240 to save storage space. No error checking is included.
In a Linux console cut and paste the following code into a file and call it say gp2x-convert:
#!/bin/sh
if [ -z "$1" ]; then
echo usage: $0 source_video_file gp2x_dest_file.avi
exit
fi
INFILE=$1
OUTFILE=$2
echo $INFILE
echo $OUTFILE
/usr/bin/mencoder “$INFILE” -o “$OUTFILE” -ovc xvid -xvidencopts bitrate=320 -vop scale=320:240 -oac mp3lame -lameopts abr:br=128
Make the script executable and then run it as shown in the following example:
chmod +x gp2x-convert

./gp2x-convert sourcefile.avi destfile.avi
I would appreciate your feedback if you have comments, corrections or additions to this article, Thanks.
See Comments
Configuring the GP2X on Mandriva 2007
January 4, 2007 Reading time: 5 minutes See Comments
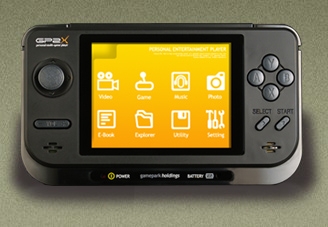 My new toy is the GP2X, a linux based handheld multimedia device. It’s an awesome little device. If you want to know more about the features of the GP2X click here.
Below I have detailed the steps I made to make life easier when using the GP2X with Mandriva Linux 2007.
The GP2X can act as a standard USB storage device, allowing you to drag and drop files just like you do with a hard disk. This is good but using the USB Network feature of the GP2X is much more useful and once setup a lot easier to use. As an added bonus you can still use the GP2X while it is connected and transferring files.
Before beginning see this article at http://wiki.gp2x.org/articles/u/s/b/UsbNet_on_Linux.html and follow the instructions under “Troubleshooting”. This will make your GP2X compatible with the 2.6 Kernel of Mandriva 2007. (This step may not be necessary, but until I did this the network would lock up).
To setup the GP2X end go into “Setting” from the main menu, then select “System”, make sure “Menu Extension” is on. Scroll down to “USB Network”. Make these settings…
USB Network: Always On
IP: 192.168.0.2
FTP,Telnet Server: Always On
Samba Server: Always On
Press “B” to save the settings, there may be a slight pause while the network starts.
To setup the PC end, first create a file called “gp2x.rules” in /etc/udev/rules.d containing the following lines
# Experimental rules to automatically bring up usb0 when the GP2X is connected.
ATTRS{configuration}==”CDC Ethernet”,ATTRS{product}==”RNDIS/Ethernet Gadget”,RUN+=”/usr/bin/gp2x”
Now create a file in /usr/bin called gp2x and make it executable. (ie chmod +x /usr/bin/gp2x), with these contents:
#!/bin/sh
echo $ACTION-`date` >> /tmp/gp2x-status
if [ "$ACTION" = "add" ]
then
/sbin/ifconfig usb0 192.168.0.1 192.168.0.1
fi
Now plug in and switch on your GP2X, if all goes well in a short while you should have a network interface called usb0, check this by issuing a /sbin/ifconfig command. Now to access your GP2X you can run “telnet 192.168.0.2″, login as root, default is no password.
You can also access the GP2X samba share by running konqueror using the address smb://gp2x or open up straight into the sd card using smb://gp2x/gp2x/mnt/sd.
I’ve added two icons to my desktop to make life easier. (Right click on the desktop and select New). The first icon is an “Link to application” called “GP2X Console” which runs “/usr/bin/konsole -T GP2X -e telnet -l root 192.168.0.2″, this automatically opens up a console and logs you in. The other icon is a “Link to URL” which is called “GP2X Network” and has a location of “smb://gp2x/gp2x/mnt/sd”.
Here are the icons I used for the links:
 This one for console. (Thanks to Paul for this icon, see http://dl.openhandhelds.org/cgi-bin/gp2x.cgi?oovxdnowromm,0,0,0,8,1960 )
 and this one for network, which I modified from the above icon.
Hope this helps. Now if someone can show me how to automatically display and remove these icons on the desktop when the GP2X is plugged /unplugged that would be great. I would appreciate your feedback if you have comments, corrections or additions to this article, Thanks.
See Comments
Using WRT54GP2 with MyNetFone for VoIP
December 4, 2006 Reading time: 2 minutes See Comments
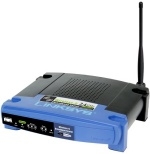 Setting up VoIP is not always trivial, here I document the settings I used to get the Linksys WRT54GP2 wireless router to work with the MyNetFone VoIP service. Also see the support page on http://www.mynetfone.com.au for more info.
You can access the router in your browser at http://192.168.15.1 (substitute your assigned IP address if you have changed it).
Basic settings page http://192.168.15.1/Voice_Line1.htm
Display Name: 09XXXXX {Your account number}
User ID: {Same Again}
Authentication User Name: {Same Again}
Authentication Password: ************** {Your Password – Case Sensitive}
Registration / Proxy Server: sip01.mynetfone.com.au
Voice Quality: Good (G.729 Require 8k Bandwidth)
Now the trickier part, you need to go to the “hidden” page at http://192.168.15.1/Voice_adminPage.htm
Here select “Line 1″ and ensure that “Line Enable” is set to “Yes” and “Use Auth ID” is set to “No”.
Now scroll down and at “Dial Plan” enter a dial plan, something like the following should work OK (for Australia),
(*xx.|000S0|121S0|151S0|181S0|[2-9]xxxxxxxS0|0[23478]xxxxxxxxS0|0011xxx.|1800xxxxxxS0|
1300xxxxxxS0|13[1-9]xxxS0|xxx.)
Now, click “Save Settings”, if you get an error at this point, don’t worry the settings will still be saved, just wait about 10 seconds, then enter http://192.168.15.1/Voice_adminPage.htm again to see the updated settings.
That’s it, plug a telephone into Line 1 and you should get a dial tone and be able to make calls.
To setup Line 2 repeat the above steps substituting Line 2 where appropriate.