Installing Dropbox on Mandriva 2010.2 KDE
April 4, 2011 Reading time: 2 minutes See Comments
 Dropbox is a great idea, and has Linux support, the only problem is that it currently only supports the Nautilus file manager (Gnome). I thought this wouldn’t be such a problem so I loaded it using "urpmi dropbox" in the console or you could use “Install & Remove Software”. The Dropbox icon can then be found on the “Internet” menu.
It all appeared to work perfectly, Dropbox downloaded its binary file and then I entered my account details and all was good. (Note: You may need to start Dropbox a second time before it downloads the binary, not sure why that was).
Dropbox places an icon in the system tray, clicking on it opens Nautilus and shows you your files. You can add/update and edit your files and it all just works. I thought OK I’ll just use Nautilus for Dropbox and all is good.
Then I plugged in my USB stick and noticed that the Device Notifier was no longer working properly, it was now calling Nautilus instead of Dolphin and not opening the USB devices properly. That wouldn’t do, so this is how I fixed it…
First I removed the Dropbox and Nautilus RPMs using “urpme nautilus-dropbox nautilus gnome-desktop-common libgnome-desktop-2_17 libexempi3″ in the console. This leaves the dropboxd binary file that was downloaded when I ran Dropbox so I can just use that to do what I need. Next from the menu go to “Tools->System Tools->Configure Your Desktop”, click the “Advanced” tab and then double click the “AutoStart” icon. You’ll probably find like I did that the Dropbox entry is still there (If not you’ll need to create one). Click on the Dropbox entry and then click the Properties button, on the Application tab replace the Dropbox command which will be something like “dropbox start -i” with “~/.dropbox-dist/dropboxd” (without the quotes). Logout and Login again.
Now when I start KDE the Dropbox icon automatically shows up in the system tray and even better if you click it now it opens Dolphin and not Nautilus. My Device Notifier also returned to normal. All is good :)
See Comments
NIS/NFS Networking with Mandriva 2010
March 9, 2010 Reading time: 6 minutes See Comments
 I recently setup a network using NIS & NFS with Mandriva Linux (Running KDE) as the server and workstation OS. I chose to have Linux installed on each workstation (rather than using LTSP), as the machines are reasonable in specifications.
When completed the workstations now show the list of users on the login screen. Users can login to any of the workstations and get their desktop complete with all their settings (background, themes, email setup, etc). This makes for a very flexible setup where if one workstation fails the user can simply logon somewhere else until the workstation is fixed. It also means that all user data and configuration is stored centrally on the server.
Server Setup
These instructions refer specifically to Mandriva 2010 (or Mandriva 2009) but the setup would be very similar for other Linux flavours. You should open a console as root or su to root to issue these commands. I use ‘vi’ to edit the configuration files but you could also use ‘nano’ or ”kwrite’ if you like.
Install the packages: ‘ypserv’ and ‘rpcbind’ (or ‘portmap’ for Mandriva 2009):
# urpmi ypserv rpcbindMake sure that the services are set to start on bootup:
# chkconfig –level 345 ypserv on
# chkconfig –level 345 rpcbind on (or portmap for Mandriva 2009)
Set the domain name (not the internet domain name, just the NIS domain name used internally). I just used “server” for simplicity :-
Add “NISDOMAIN=server” to the end of the “/etc/sysconfig/network” file.
Issue the command “domainname server”
(Note that I do both of the above as I noticed that just using the domainname command worked but seemed to be forgotten later. To check that your domainname is still set just issue the “domainname” command with no parameters).
Make the user home directory mount point. I use /export/home rather than /home to save confusion later on:
# mkdir -p /export
# mkdir /export/home
If you have existing accounts in /home on the server that you wish to move to /export/home:
# mv /home/fred /export/home (Move Fred’s account)For all moved users edit the /etc/passwd to set the new path. Note that I set all “exported” user ids to 600 or over so that we can selectively export only the users over 600 and excude the local users from 500 to 599
ie. fred:x:600:600:Fred Flintstone:/export/home/fred:/bin/bash
Create (or add to) the /etc/exports file. The following example assumes you are using the 192.168.1.x network. The first line exports the home directories of all users, the following optional lines show how to export a few other shared directories if needed:
/export 192.168.1.0/24(rw,no_root_squash,no_subtree_check,sync)
/data/public *(no_all_squash,sync,secure,rw)
/data/office *(no_all_squash,sync,secure,rw)
/data/admin *(no_all_squash,sync,secure,rw)
Make the NIS maps. This also needs to be run after adding, changing or removing users. Note that I set MINUID and MINGID to 600 in the /var/yp/MakeFile so that users 500 to 599 are not shown:
# cd /var/yp
# make
That’s the server configuration complete. You can now add new users if required, when adding them set their home directory to /export/home/{username} (you may need to mkdir the directory before adding the user) and their userid/groupid to 600+. You can now either start the required services (ypserv, rpcbind, portmap) or just restart the server and you’re ready to go.
Client Setup
Install the packages ‘ypbind’, ‘autofs’ and ‘rpcbind’ (or ‘portmap’ for Mandriva 2009):
# urpmi ypbind autofs rpcbindMake sure that the services are set to start on bootup:
# chkconfig –level 345 ypbind on
# chkconfig –level 345 autofs on
# chkconfig –level 345 rpcbind on (or portmap for Mandriva 2009)
Set the domain name (not the internet domain name, just the NIS domain name used internally). I just used “server” for simplicity :-
Add “NISDOMAIN=server” to the end of the “/etc/sysconfig/network” file.
Issue the command “domainname server”
Add nis to the following entries in /etc/nsswitch.conf as follows:
passwd: nis files
shadow: nis files
group: nis files
automount: files nis
Add to end of /etc/yp.conf:
ypserver 192.168.1.2 (Use your servers IP address here)Add to end of /etc/autofs/auto.master:
/export auto.export –timeout 30Create auto.export with the contents:
home -fstype=nfs,rsize=8192,wsize=8192,nosuid,nolock 192.168.0.2:/export/home
mkdir -p /export
Finally switch off auto-login (if enabled) in Control Centre.
See Comments
Using WRT54GP2 with MyNetFone for VoIP
December 4, 2006 Reading time: 2 minutes See Comments
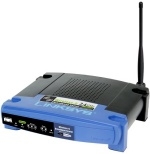
 Setting up VoIP is not always trivial, here I document the settings I used to get the Linksys WRT54GP2 wireless router to work with the MyNetFone VoIP service. Also see the support page on http://www.mynetfone.com.au for more info.
You can access the router in your browser at http://192.168.15.1 (substitute your assigned IP address if you have changed it).
Basic settings page http://192.168.15.1/Voice_Line1.htm
Display Name: 09XXXXX {Your account number}
User ID: {Same Again}
Authentication User Name: {Same Again}
Authentication Password: ************** {Your Password – Case Sensitive}
Registration / Proxy Server: sip01.mynetfone.com.au
Voice Quality: Good (G.729 Require 8k Bandwidth)
Now the trickier part, you need to go to the “hidden” page at http://192.168.15.1/Voice_adminPage.htm
Here select “Line 1″ and ensure that “Line Enable” is set to “Yes” and “Use Auth ID” is set to “No”.
Now scroll down and at “Dial Plan” enter a dial plan, something like the following should work OK (for Australia),
(*xx.|000S0|121S0|151S0|181S0|[2-9]xxxxxxxS0|0[23478]xxxxxxxxS0|0011xxx.|1800xxxxxxS0|
1300xxxxxxS0|13[1-9]xxxS0|xxx.)
Now, click “Save Settings”, if you get an error at this point, don’t worry the settings will still be saved, just wait about 10 seconds, then enter http://192.168.15.1/Voice_adminPage.htm again to see the updated settings.
That’s it, plug a telephone into Line 1 and you should get a dial tone and be able to make calls.
To setup Line 2 repeat the above steps substituting Line 2 where appropriate.