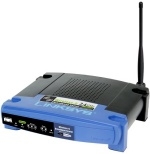
Using WRT54GP2 with MyNetFone for VoIP
December 4, 2006 Reading time: 2 minutes See Comments
 Setting up VoIP is not always trivial, here I document the settings I used to get the Linksys WRT54GP2 wireless router to work with the MyNetFone VoIP service. Also see the support page on http://www.mynetfone.com.au for more info.
You can access the router in your browser at http://192.168.15.1 (substitute your assigned IP address if you have changed it).
Basic settings page http://192.168.15.1/Voice_Line1.htm
Display Name: 09XXXXX {Your account number}
User ID: {Same Again}
Authentication User Name: {Same Again}
Authentication Password: ************** {Your Password – Case Sensitive}
Registration / Proxy Server: sip01.mynetfone.com.au
Voice Quality: Good (G.729 Require 8k Bandwidth)
Now the trickier part, you need to go to the “hidden” page at http://192.168.15.1/Voice_adminPage.htm
Here select “Line 1″ and ensure that “Line Enable” is set to “Yes” and “Use Auth ID” is set to “No”.
Now scroll down and at “Dial Plan” enter a dial plan, something like the following should work OK (for Australia),
(*xx.|000S0|121S0|151S0|181S0|[2-9]xxxxxxxS0|0[23478]xxxxxxxxS0|0011xxx.|1800xxxxxxS0|
1300xxxxxxS0|13[1-9]xxxS0|xxx.)
Now, click “Save Settings”, if you get an error at this point, don’t worry the settings will still be saved, just wait about 10 seconds, then enter http://192.168.15.1/Voice_adminPage.htm again to see the updated settings.
That’s it, plug a telephone into Line 1 and you should get a dial tone and be able to make calls.
To setup Line 2 repeat the above steps substituting Line 2 where appropriate.