System 80 Lowercase Module for Black Label Models
August 31, 2024 Reading time: 6 minutes See Comments
 Lowercase was not standard on most of the Black Label System 80's as it was on the Blue Label. Although there were likely a few later model Black Labels that had lowercase. It's not always obvious that the machine has lowercase as it isn't active by default in Level II Basic. A lowercase driver program could be installed which would make the lowercase active. In the case of the Blue Label there was an in-built ROM routine to activate the lowercase characters.
The following short program will display the character set and also indicate if lowercase is installed:
100 CLS : FOR X = 0 TO 255 : POKE 15360+X,X : NEXT
200 PRINT@320,"LOWER CASE:";
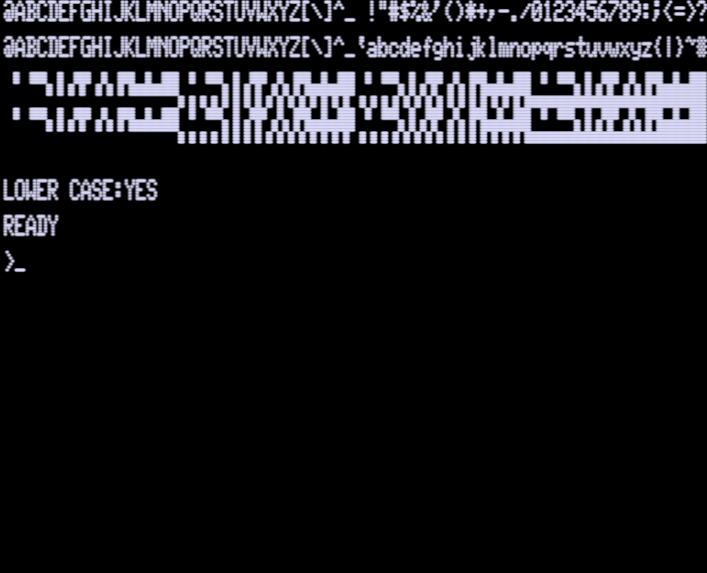
300 IF PEEK(15361)=1 THEN PRINT "YES" ELSE PRINT "NO"The result when no lowercase is installed:

This is with normal System 80 lowercase:
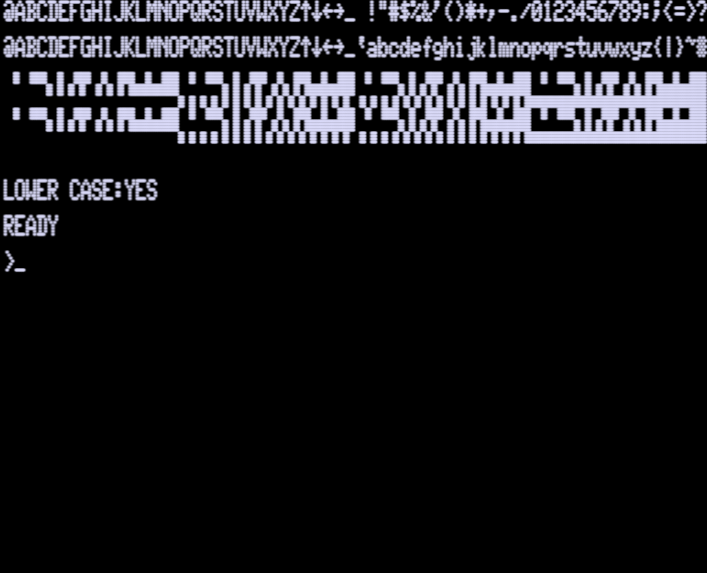
This is the modified set with arrows symbols instead of square brackets:
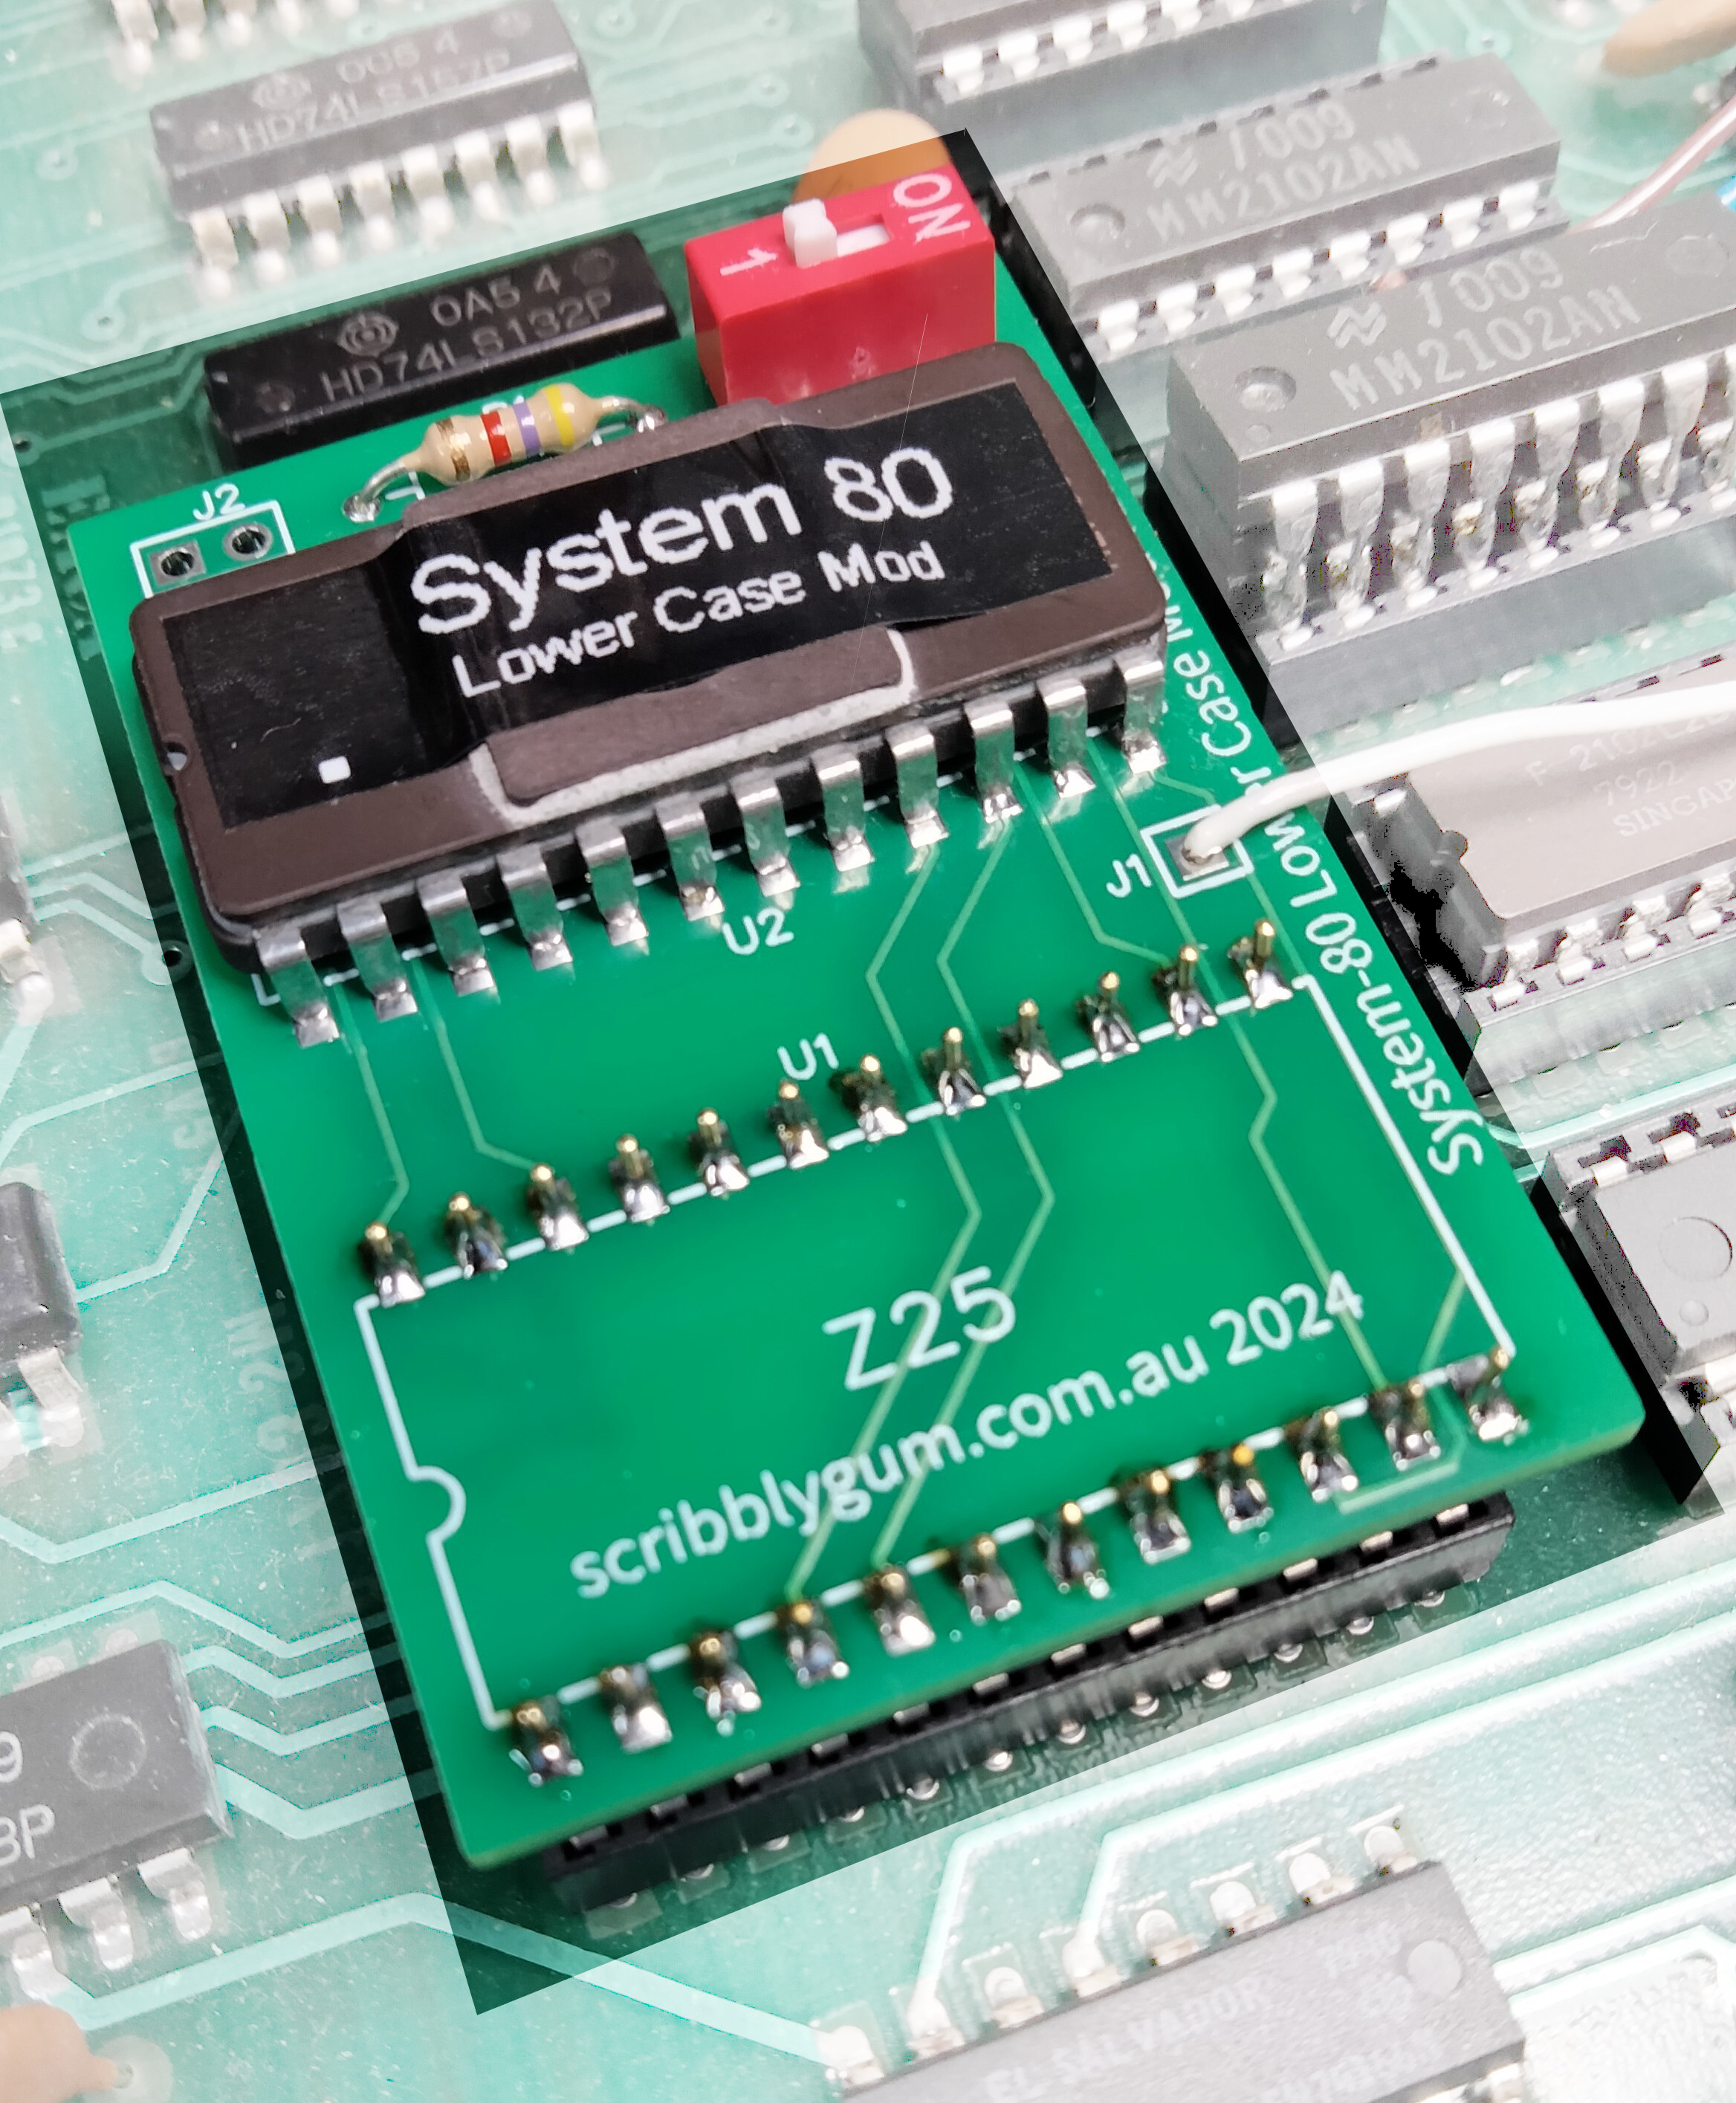
So if you've found that you don't have lowercase then consider installing this mod which will give you a choice of the standard System 80 lowercase or the modified set with the arrow symbols as found in the TRS-80 character set **. Below is an example of the early model video board. To cut costs only seven video RAM chips were installed, with only seven chips lower case is not possible, so the first thing to do is to add the eighth video RAM chip. We will do this by piggybacking the new chip onto an existing one.
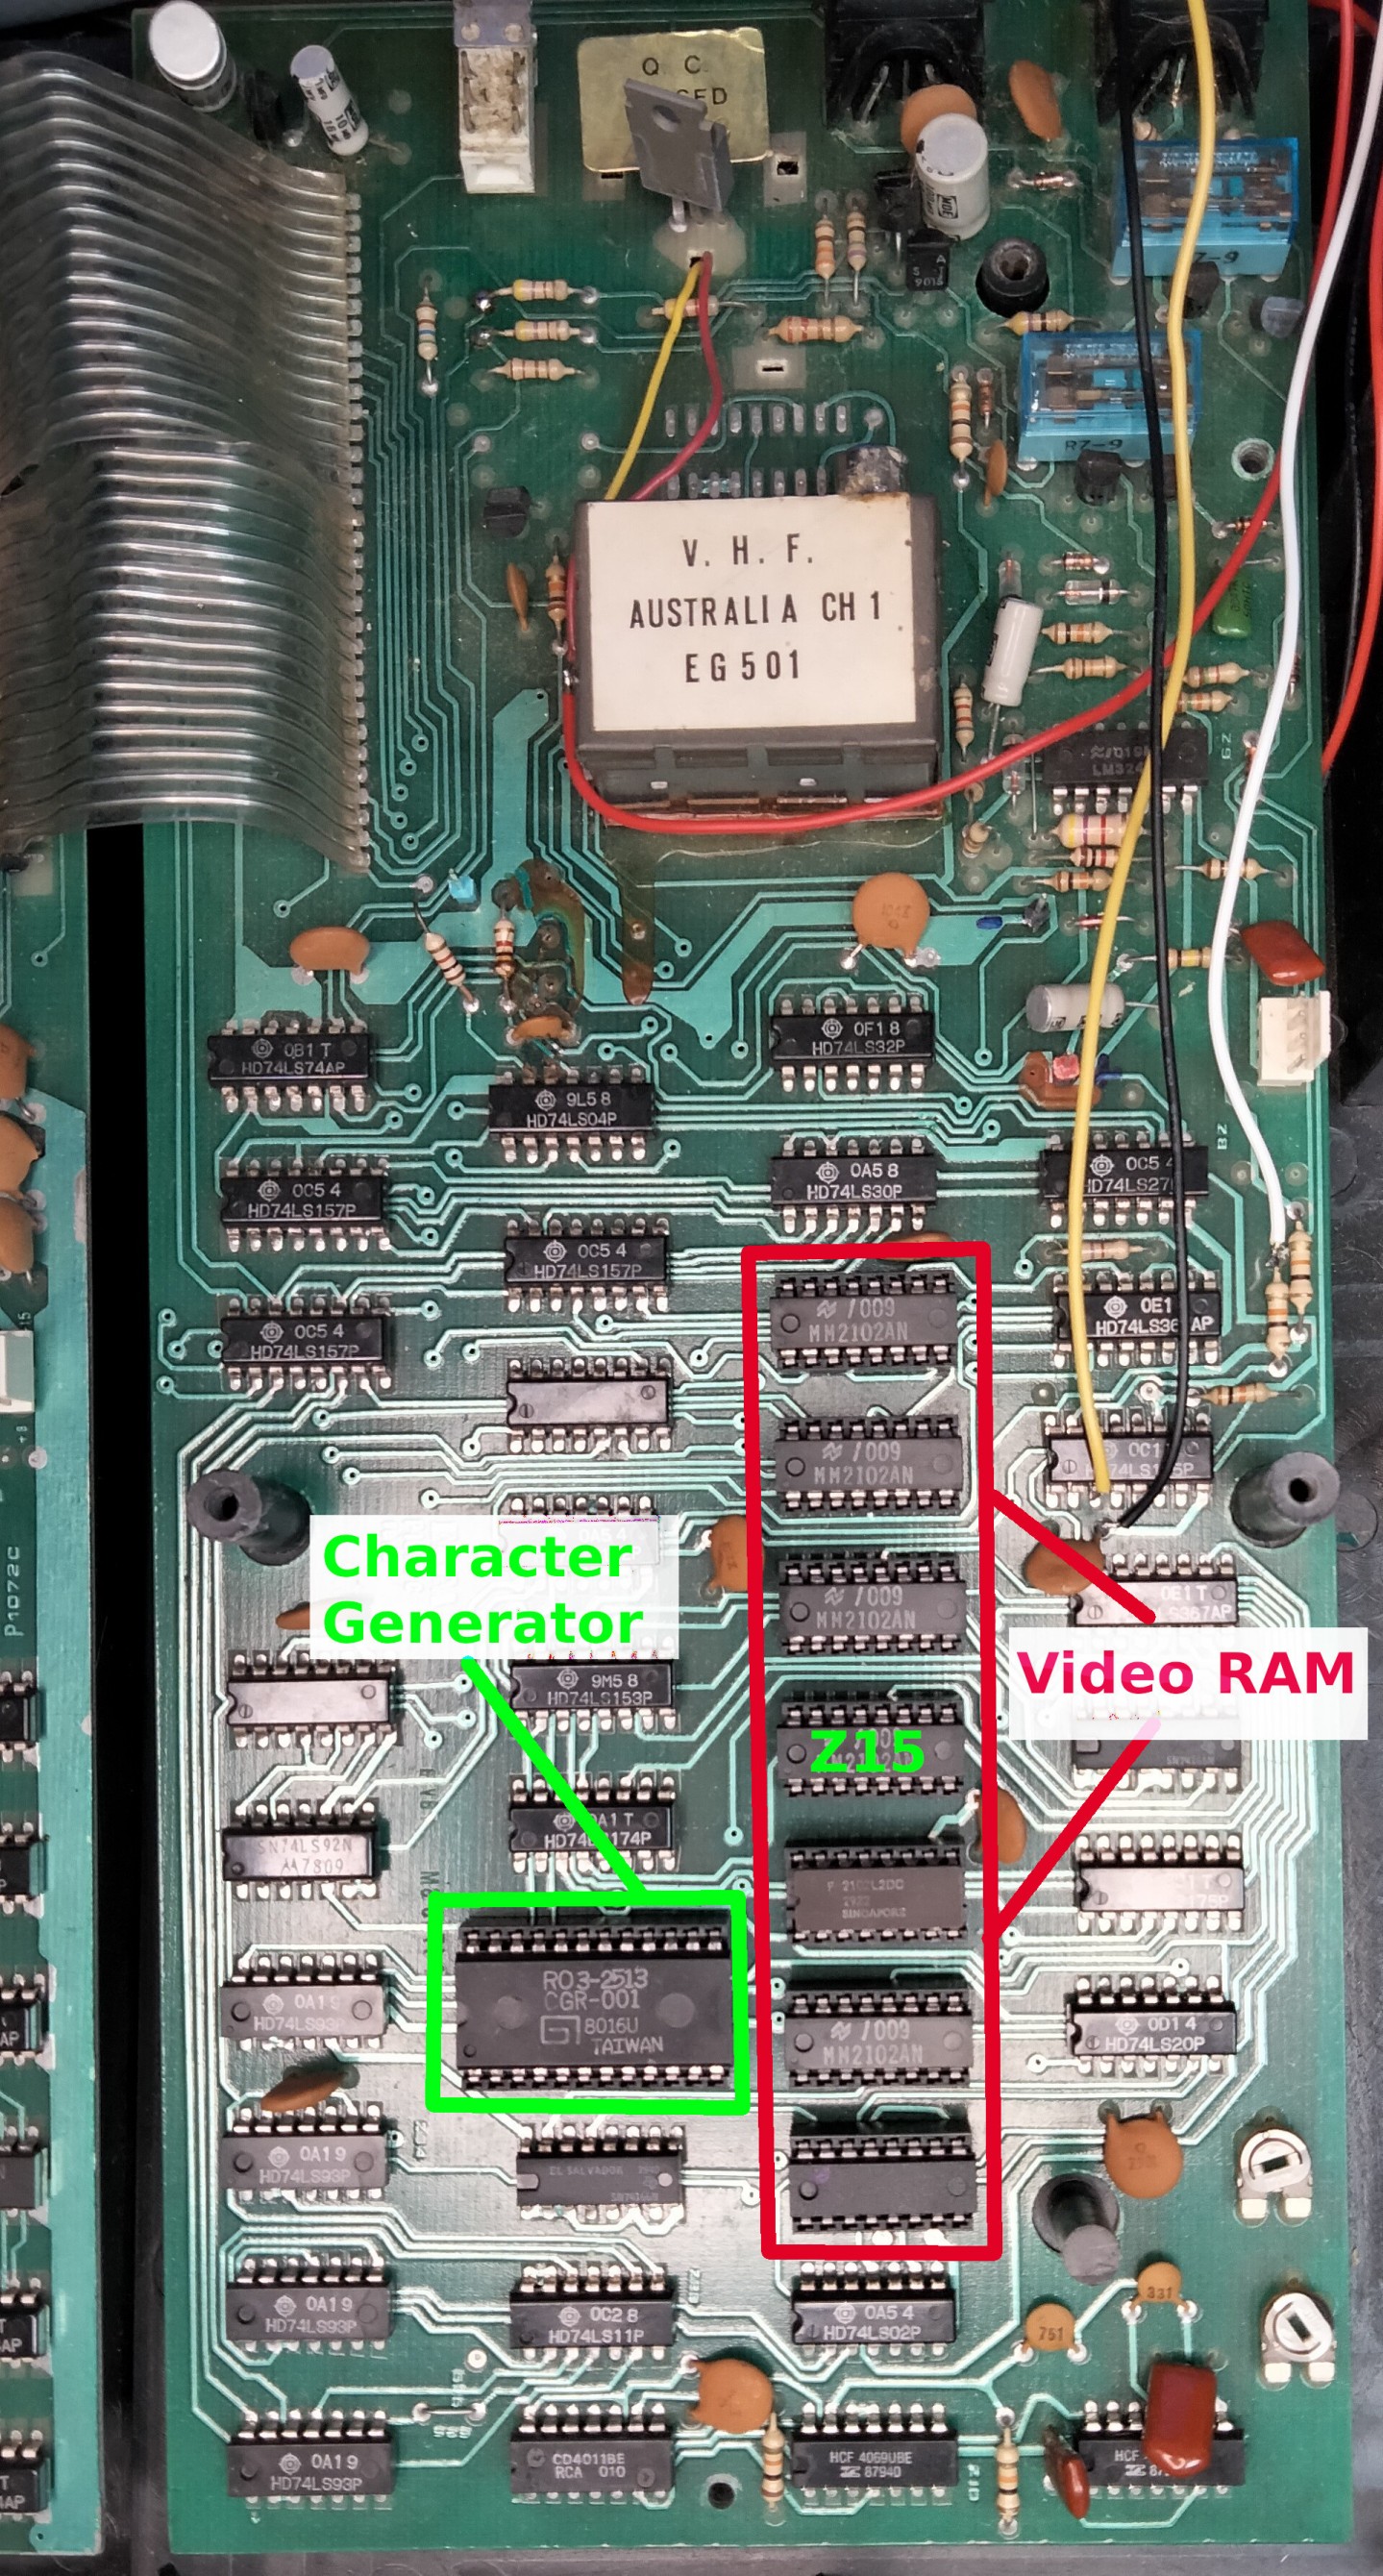
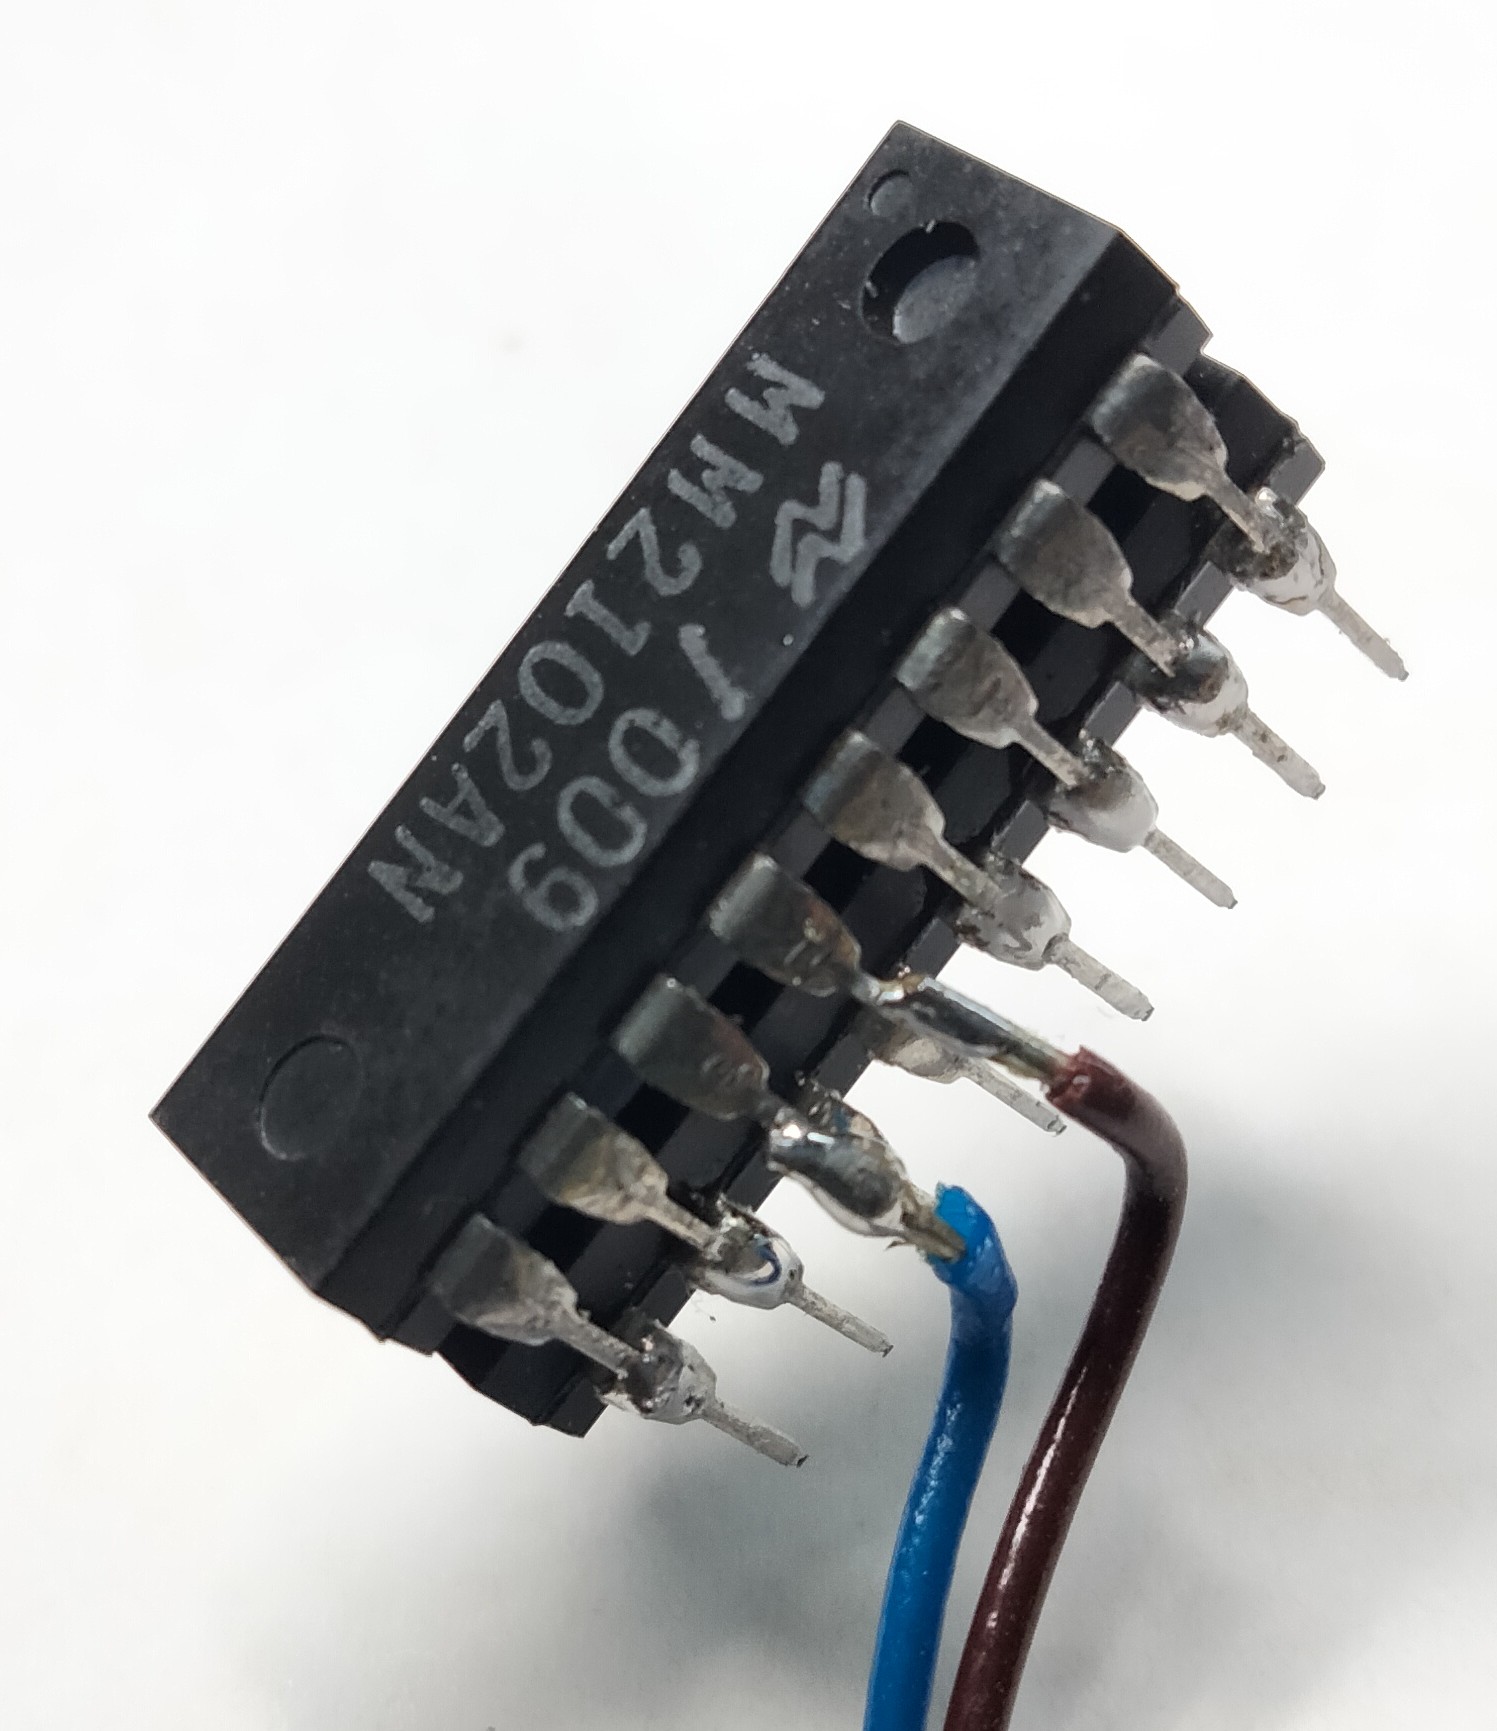
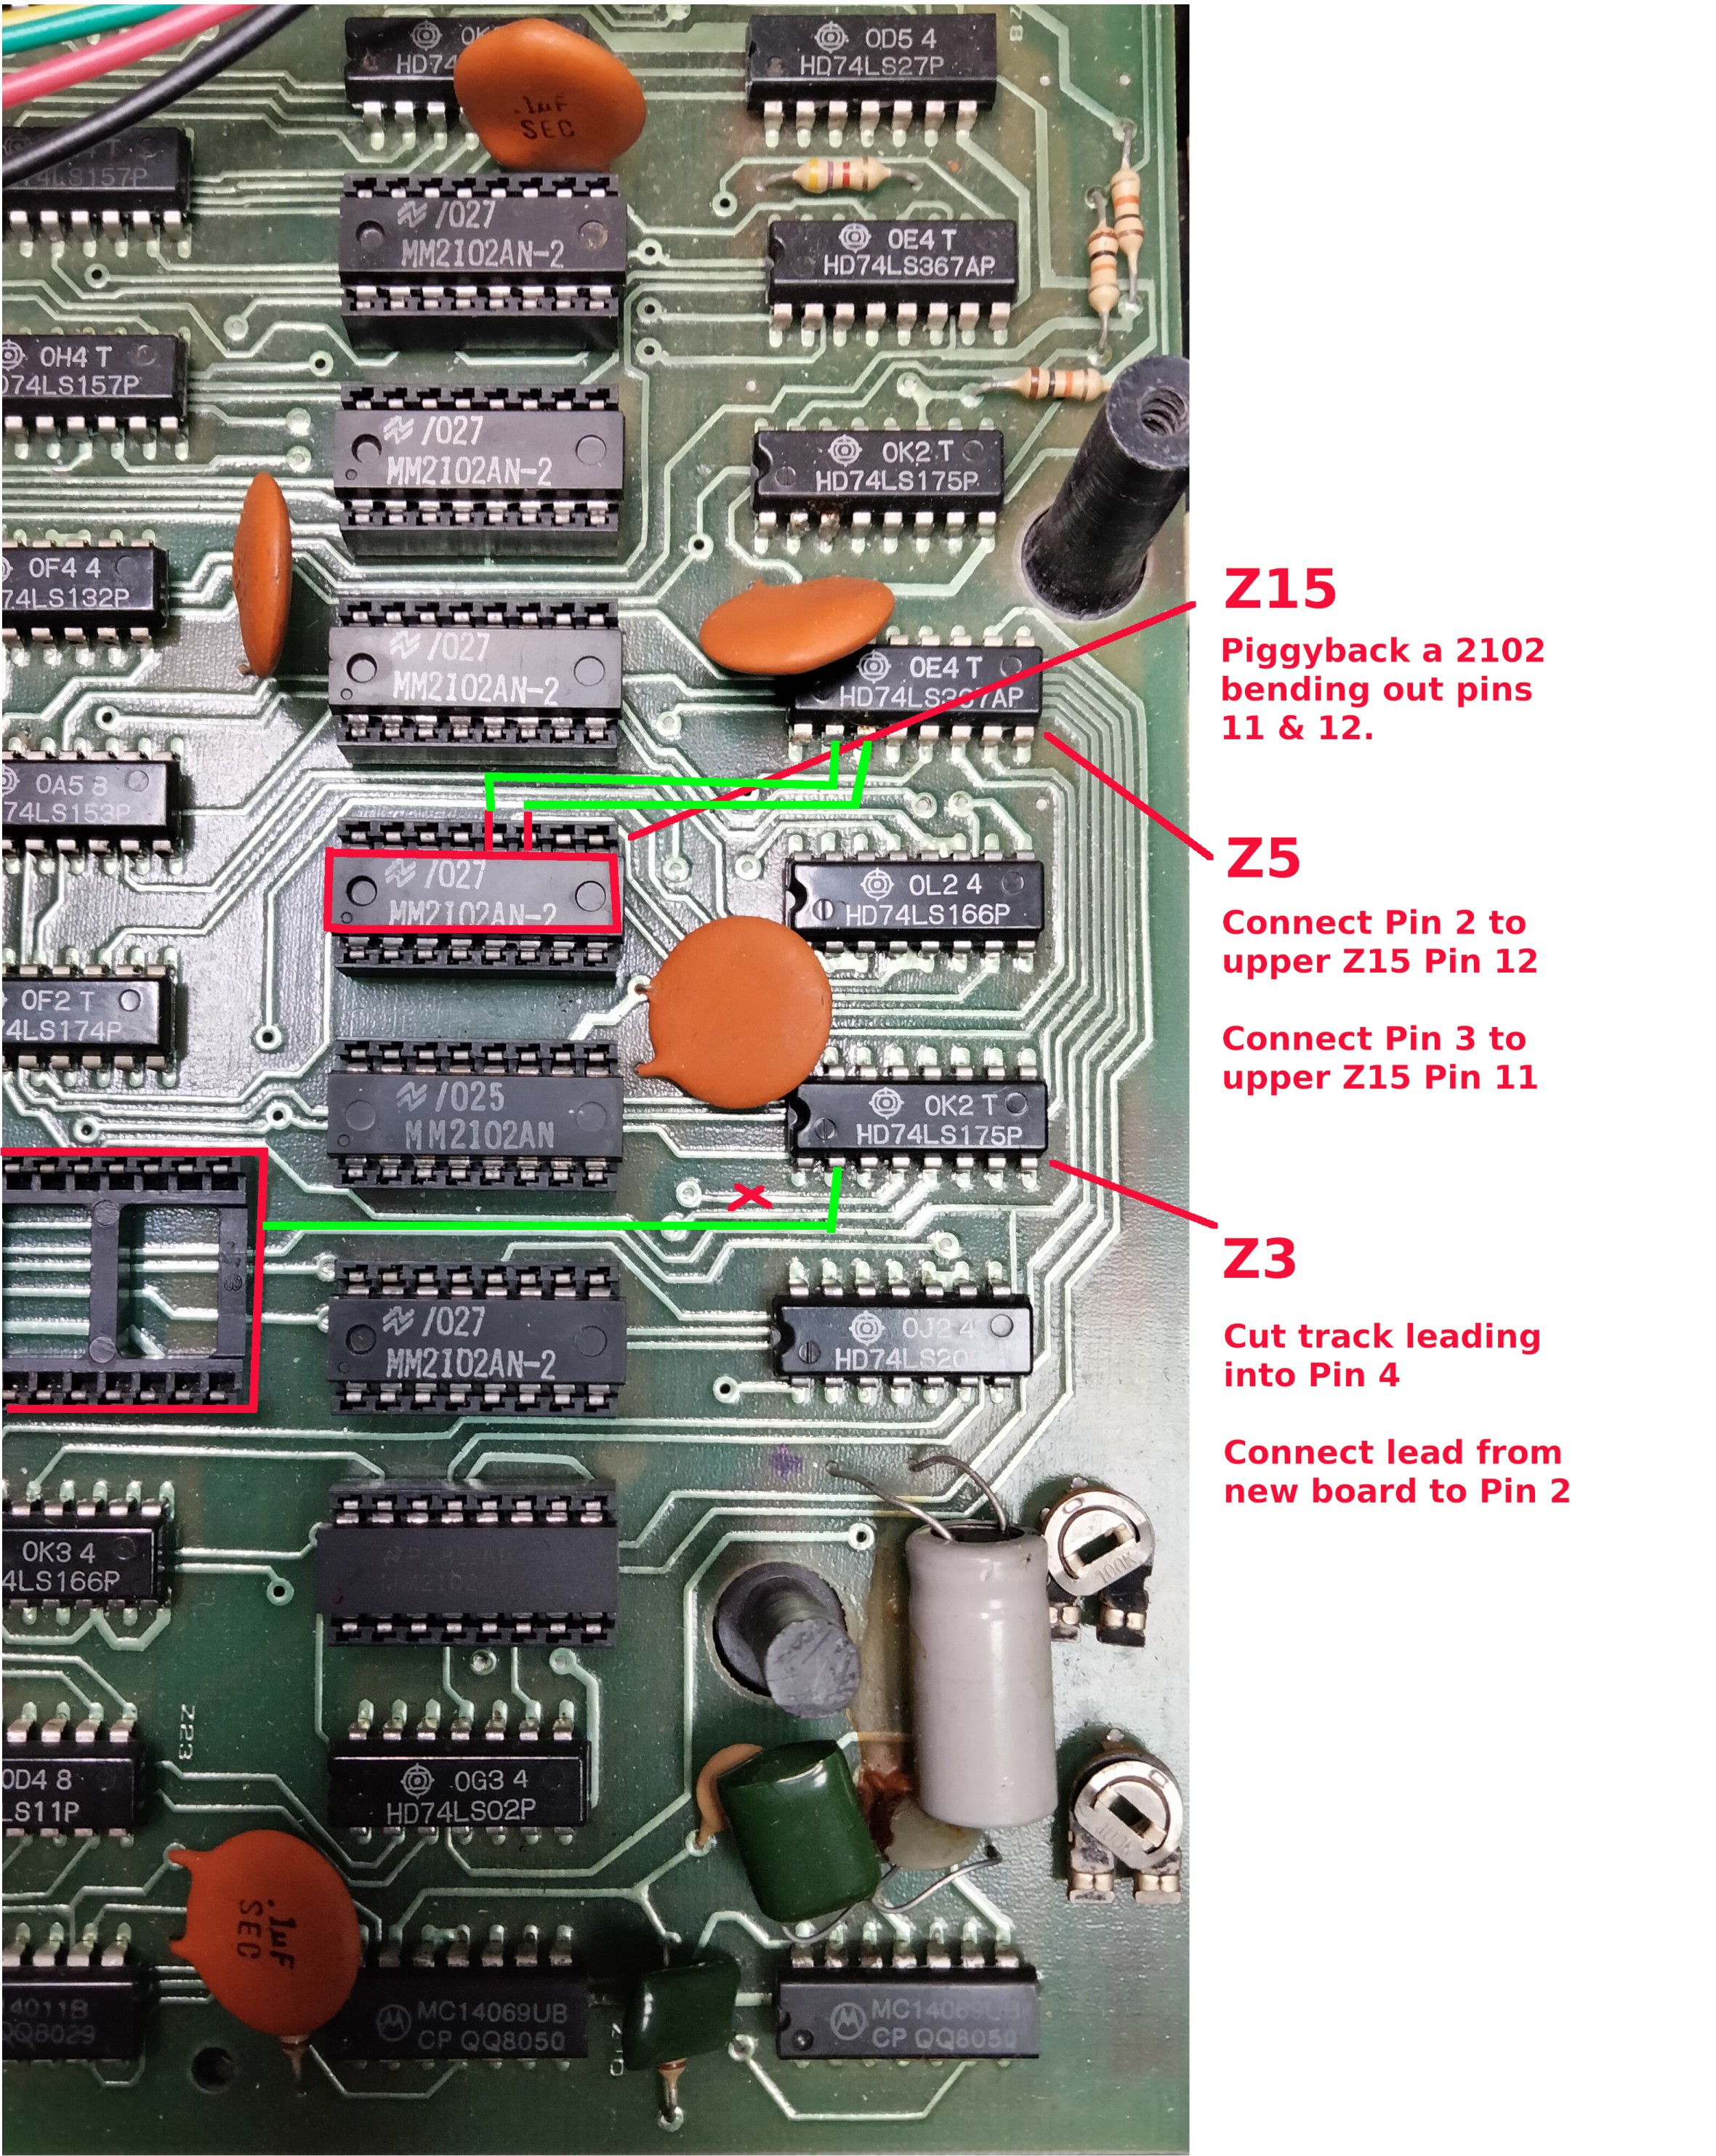
Remove Z15 (as marked on the above image) as this is the chip we will piggyback. Pins 11 & 12 of the top chip are bent out, all the rest of the pins are soldered to the lower chip. Once complete the pair can be inserted back into the socket.
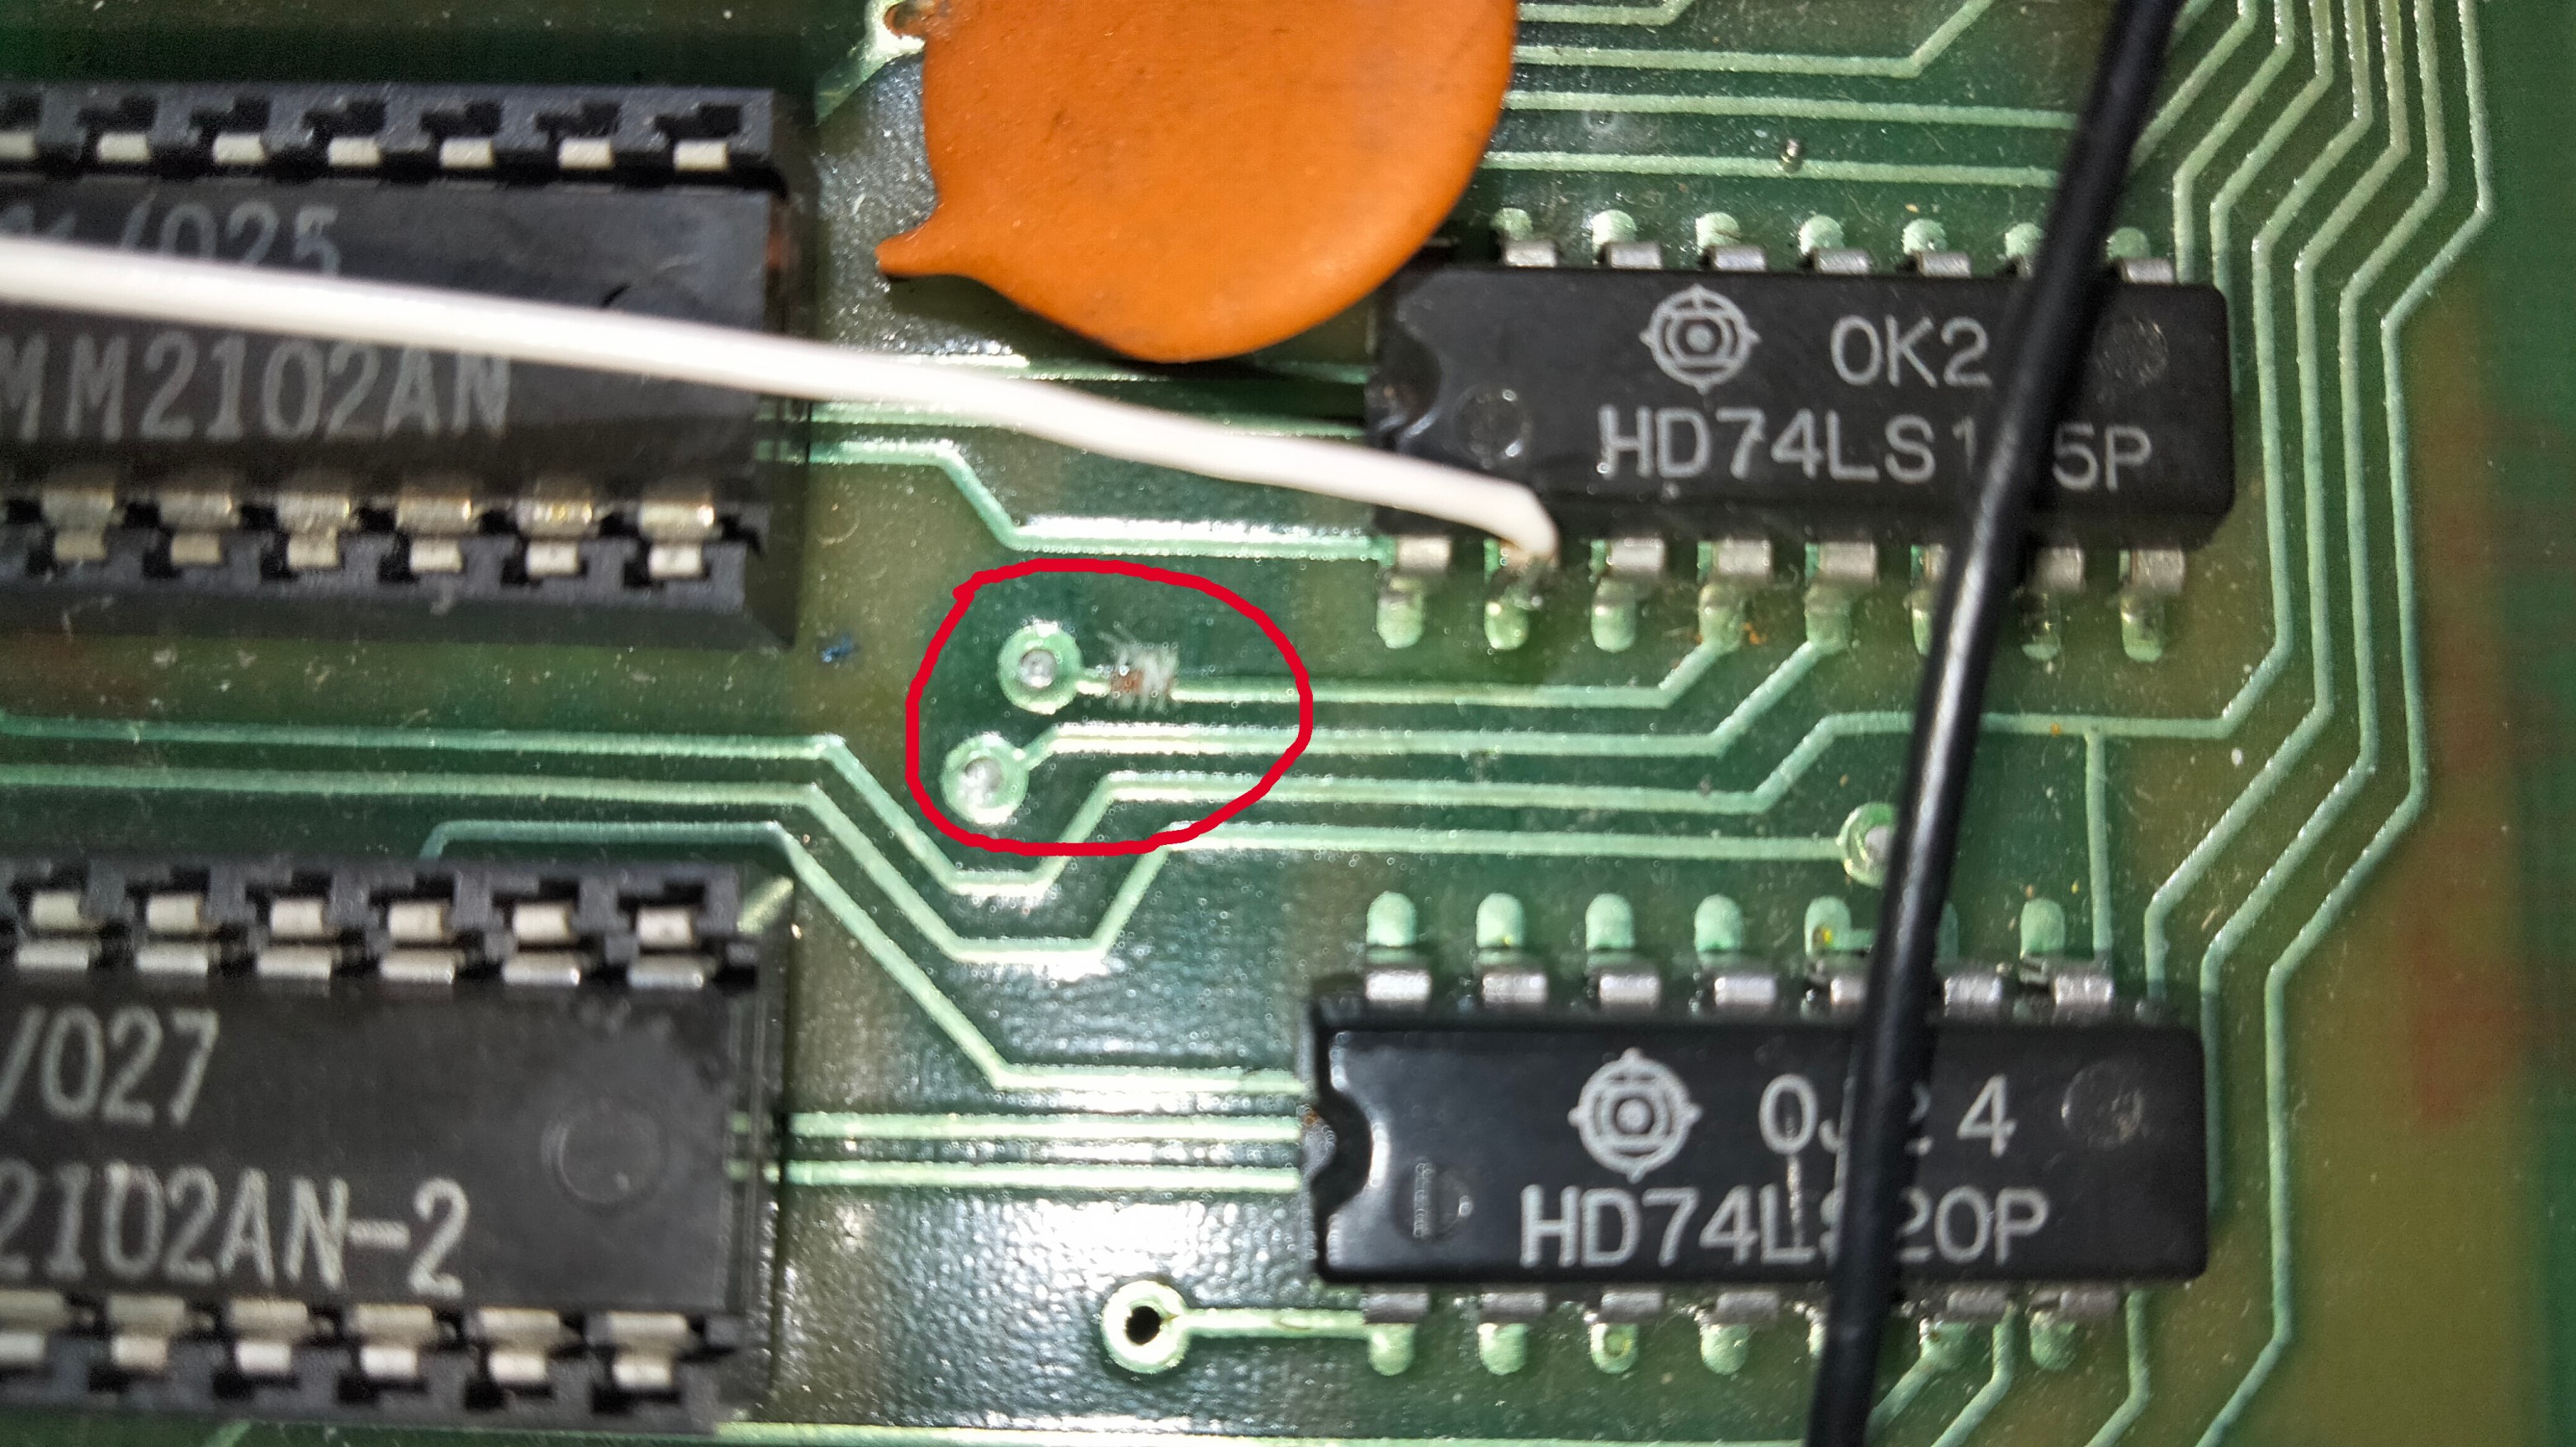
Now run a wire from the new RAM chip Pin 12 to Z5 Pin 2 and then Pin 11 to Z5 Pin 3. The last thing to do for the memory upgrade is to cut the track leading into Z3 Pin 4. See the picture below, the track needs to be cut where the Red X is marked. Best to check with a multi-meter that you've actually cut it successfully.
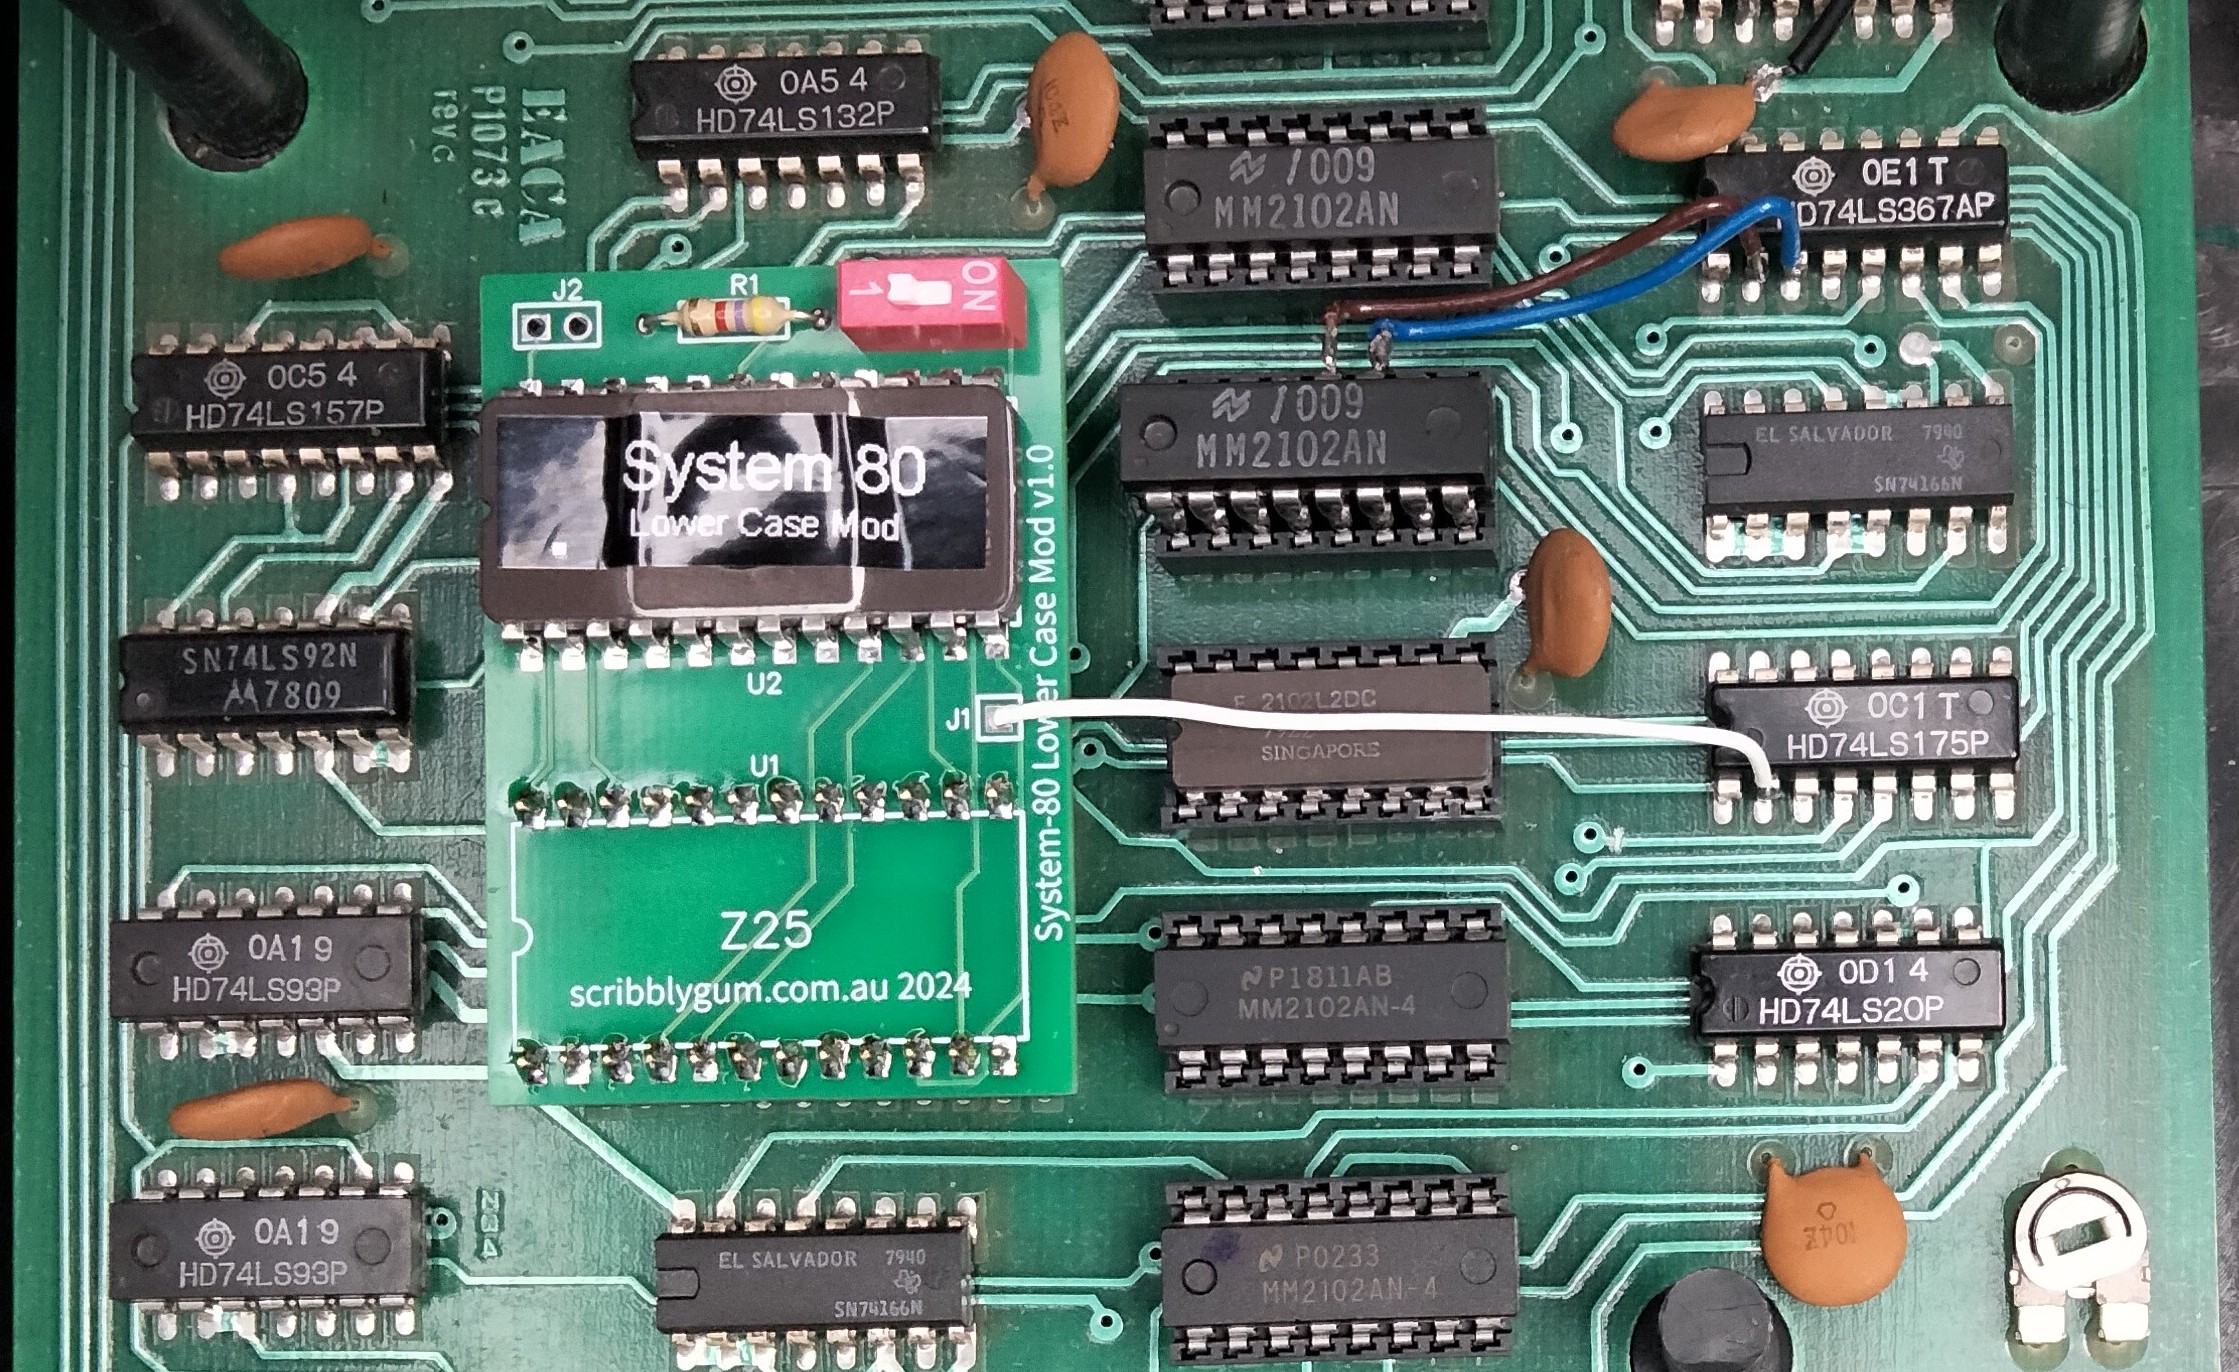
Now all that remains is to install the lowercase module, remove the character generator and place somewhere safe. At this point we need to talk about the socket. In another cost cutting exercise it is likely you have a "single wipe" socket installed (as seen in these pictures). These are the cheapest sockets available as they only have contacts that connect to the IC on one side of the pin. Much better are "dual wipe" sockets that connect either side of the IC pin and then there are machined pin sockets which contact to at least four points.
If using the single wipe socket the lowercase module may feel a little loose. If it is tight enough the lowercase will work fine but may dislodge too easily, a small amount of hot glue should help this. If the socket is very loose the only real way to fix it properly it to replace the socket (we won't deal with that here). Alternatively you could gently tease out the pins ever so slightly so they make a better contact.
Line up the module carefully with the pins and install it into the socket. The last thing to be done is to solder the flylead from the module to Z3 Pin 2 (as pictured above and below).
That's it all done, you can now run the little program at the beginning of this article and see your new lowercase characters. If you're careful you can even flip the little switch in real time and see the brackets change to arrows.
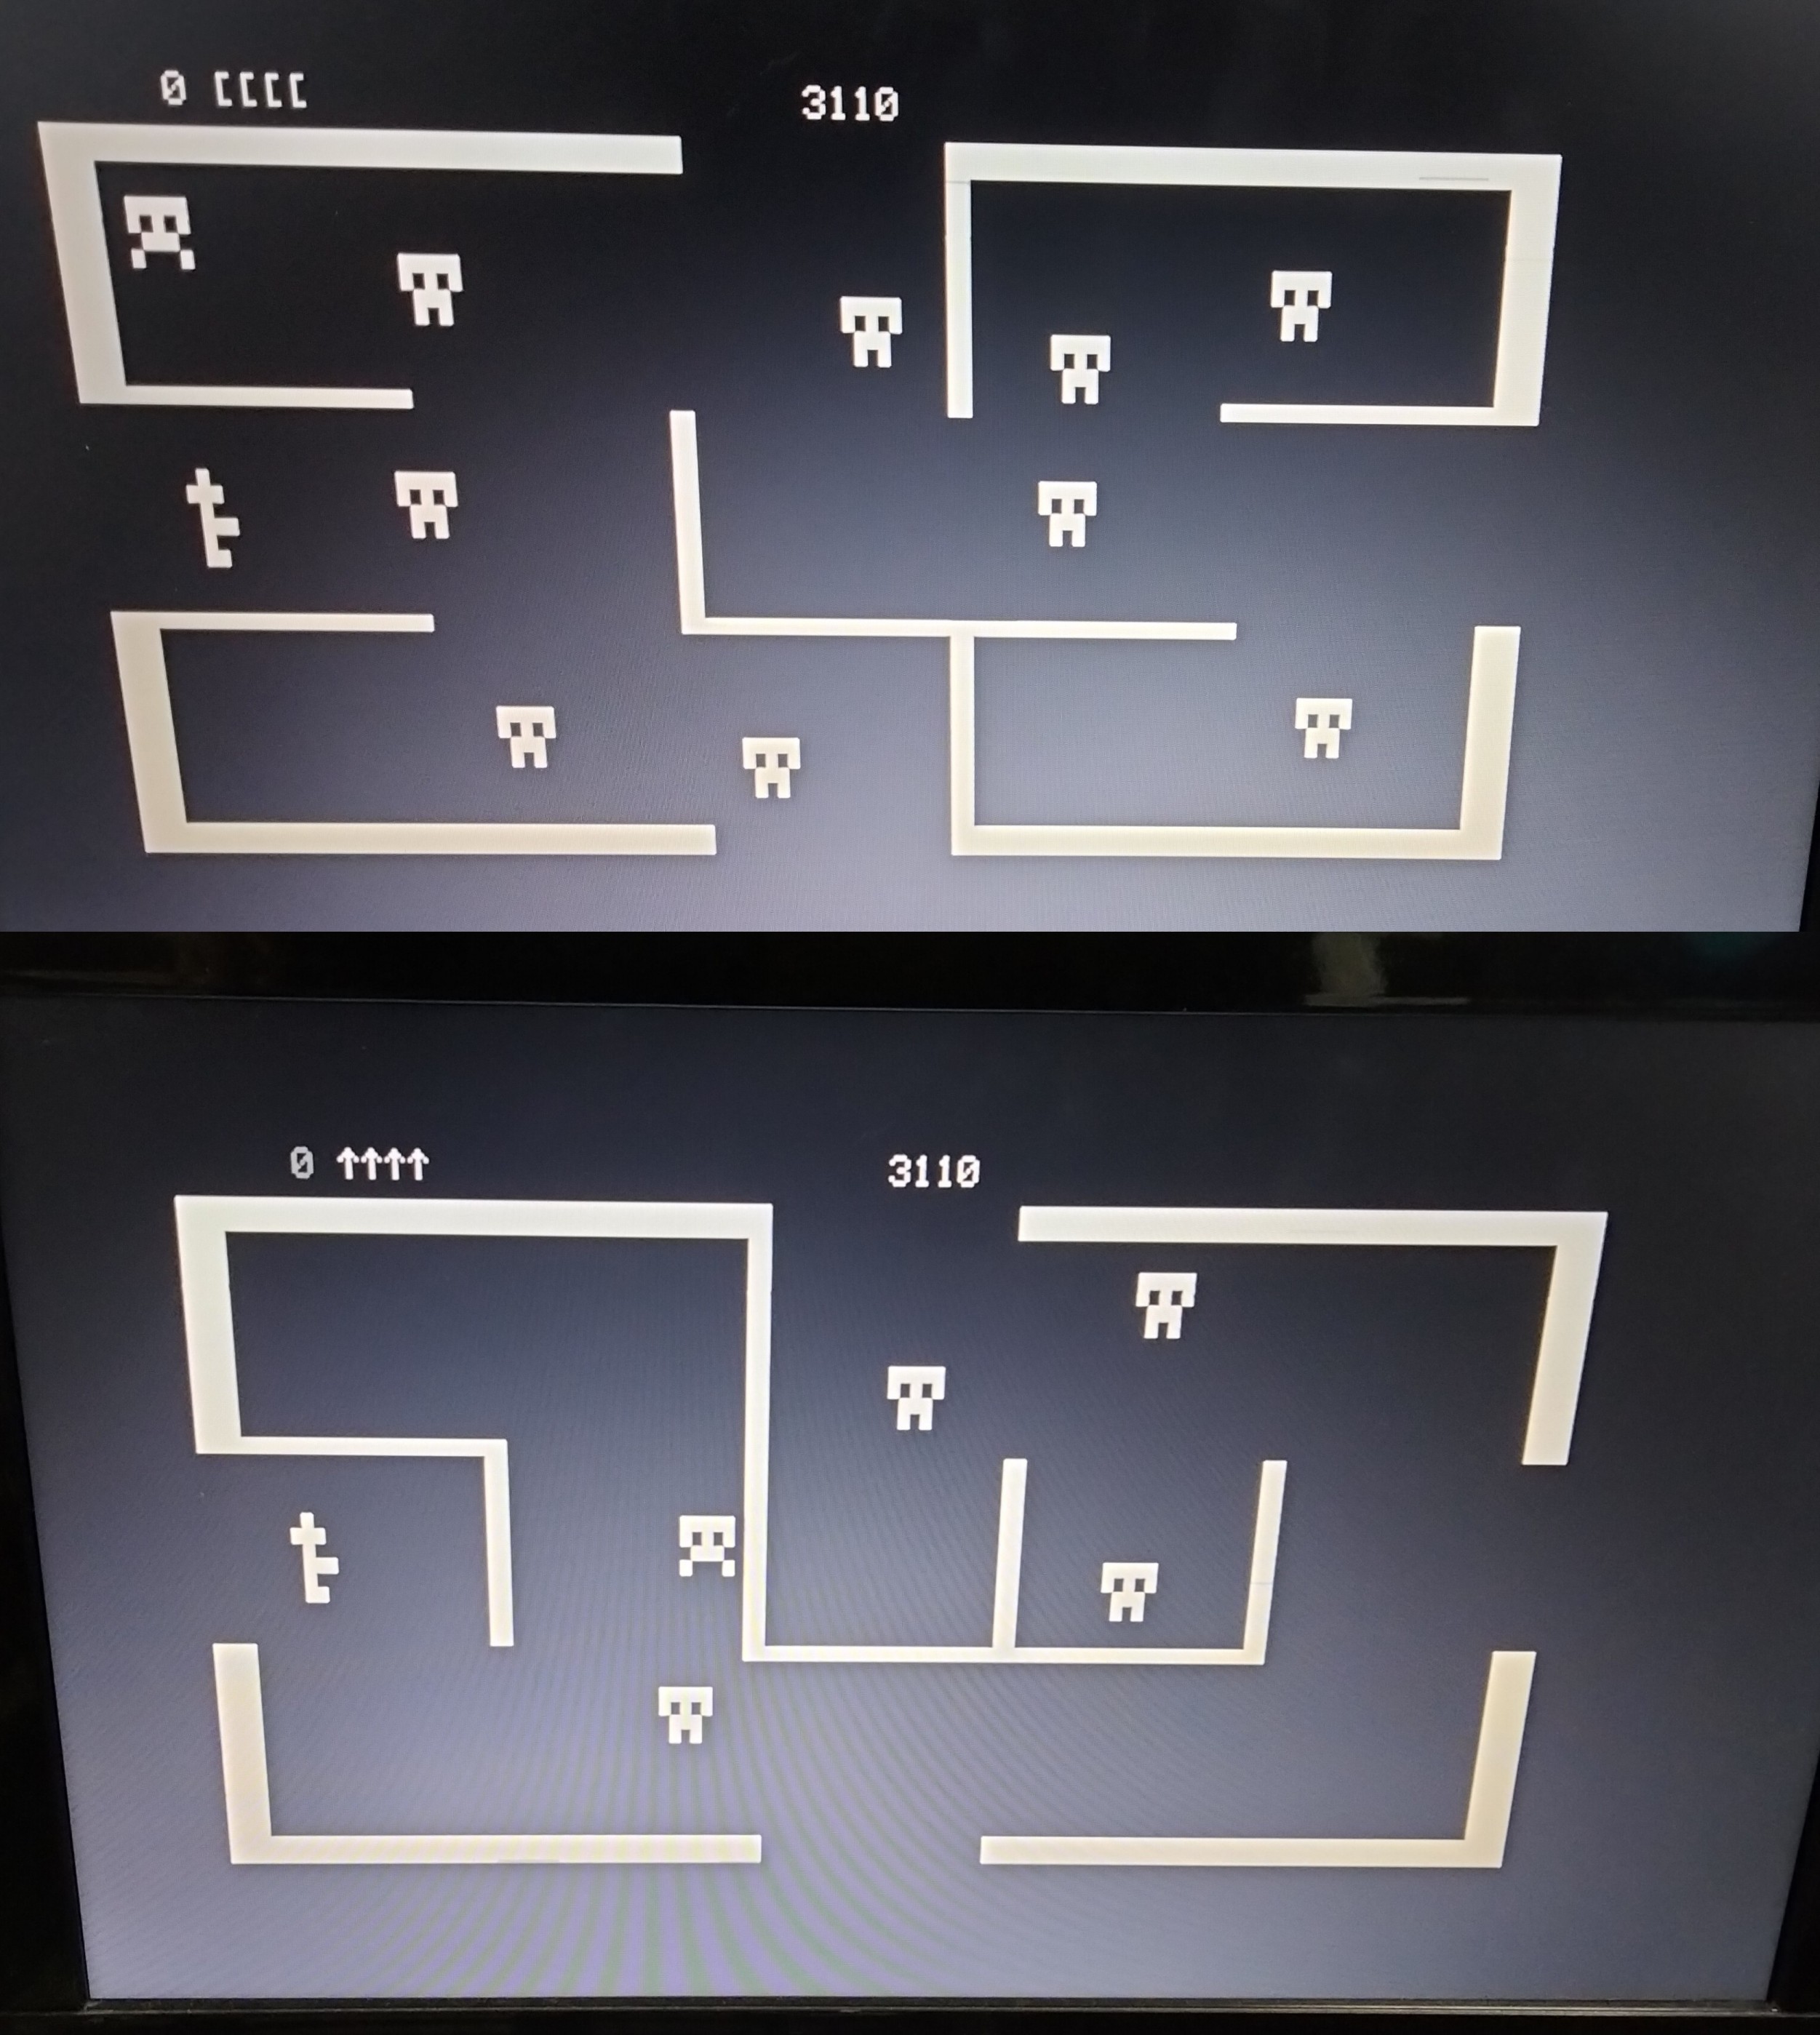
Spot the difference...